
Understanding the Media Library
The Media Library stores images, videos, and files you upload to Juuno. Assets live in either your workspace or globally across all workspaces, depending on where you need to use them.
Upload limits and file types
The Media Library accepts the following file types:
Images: JPG, JPEG, JFIF, PNG, GIF, WebP, BMP
Videos: MP4, MOV, M4V, WebM, MKV, AVI, WMV, ASF, FLV, F4V, 3GP, 3G2, MPG, MPEG, MPE, MTS, M2TS
Documents: PDF
Each file must be under 1.25 GB. If you need to upload larger files, contact [email protected].
Uploaded videos are converted for playback, so the format you start with doesn't affect what plays on your screens. This may take a moment depending on file size. You'll receive an email notification when your video is ready to use.
File types we don't accept
HEIC is the one you're most likely to hit, because it's what an iPhone saves photos in by default.
HEIC and HEIF. Set your iPhone to Most Compatible under Settings > Camera > Formats, or share the photo as JPEG before uploading.
SVG. Export your artwork as PNG instead.
Audio-only files such as MP3 and WAV. There's nothing for a screen to display.
Import from a URL
You can add images, videos, and PDFs to the Media Library by pasting a public URL, with no download and re-upload needed.
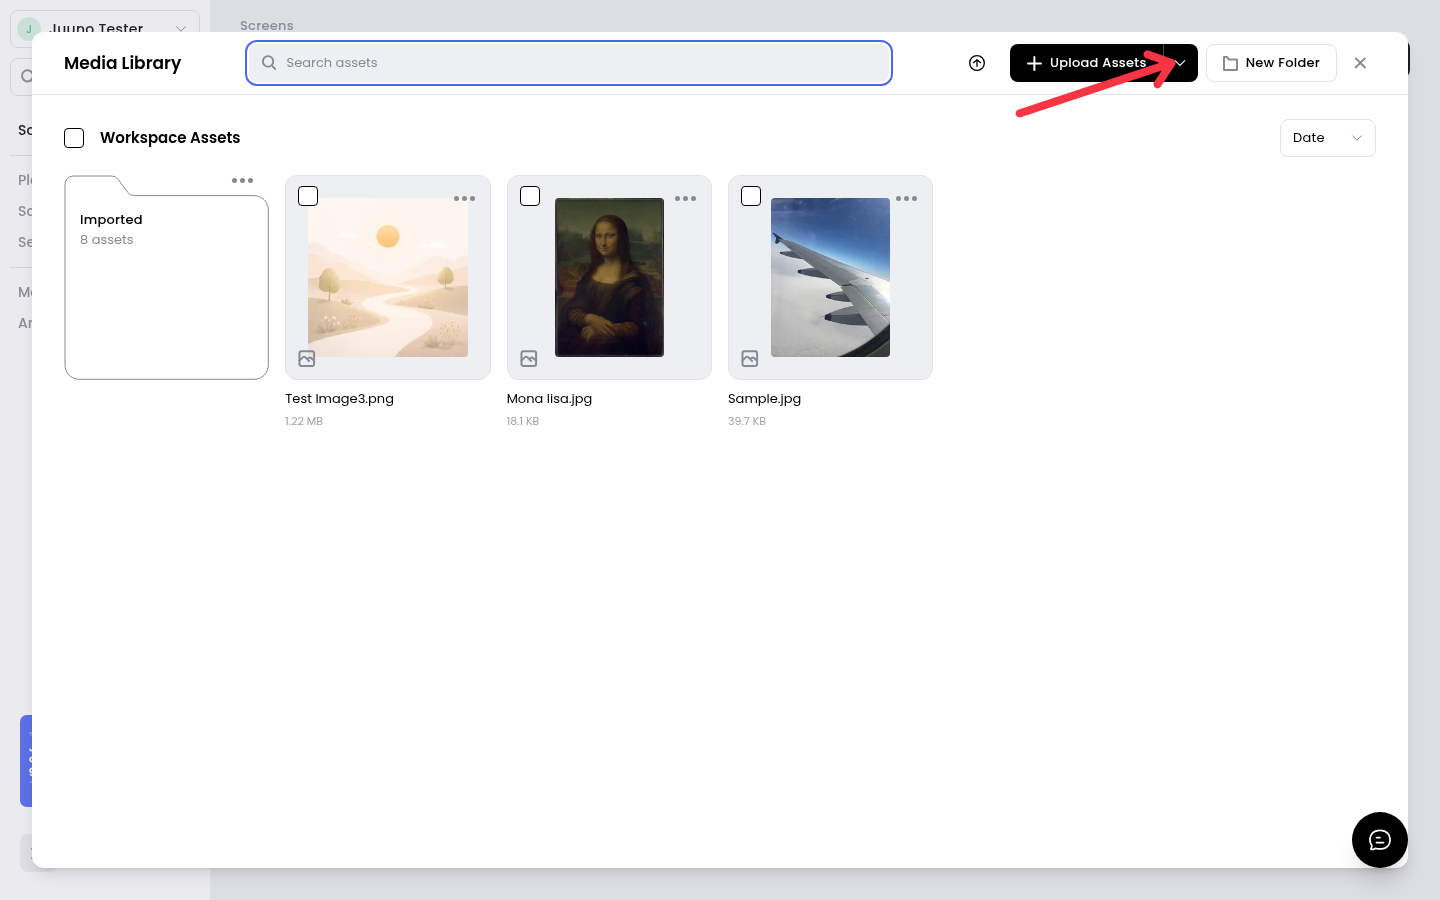
Open the Media Library from the main navigation, then click the caret next to Upload Assets.
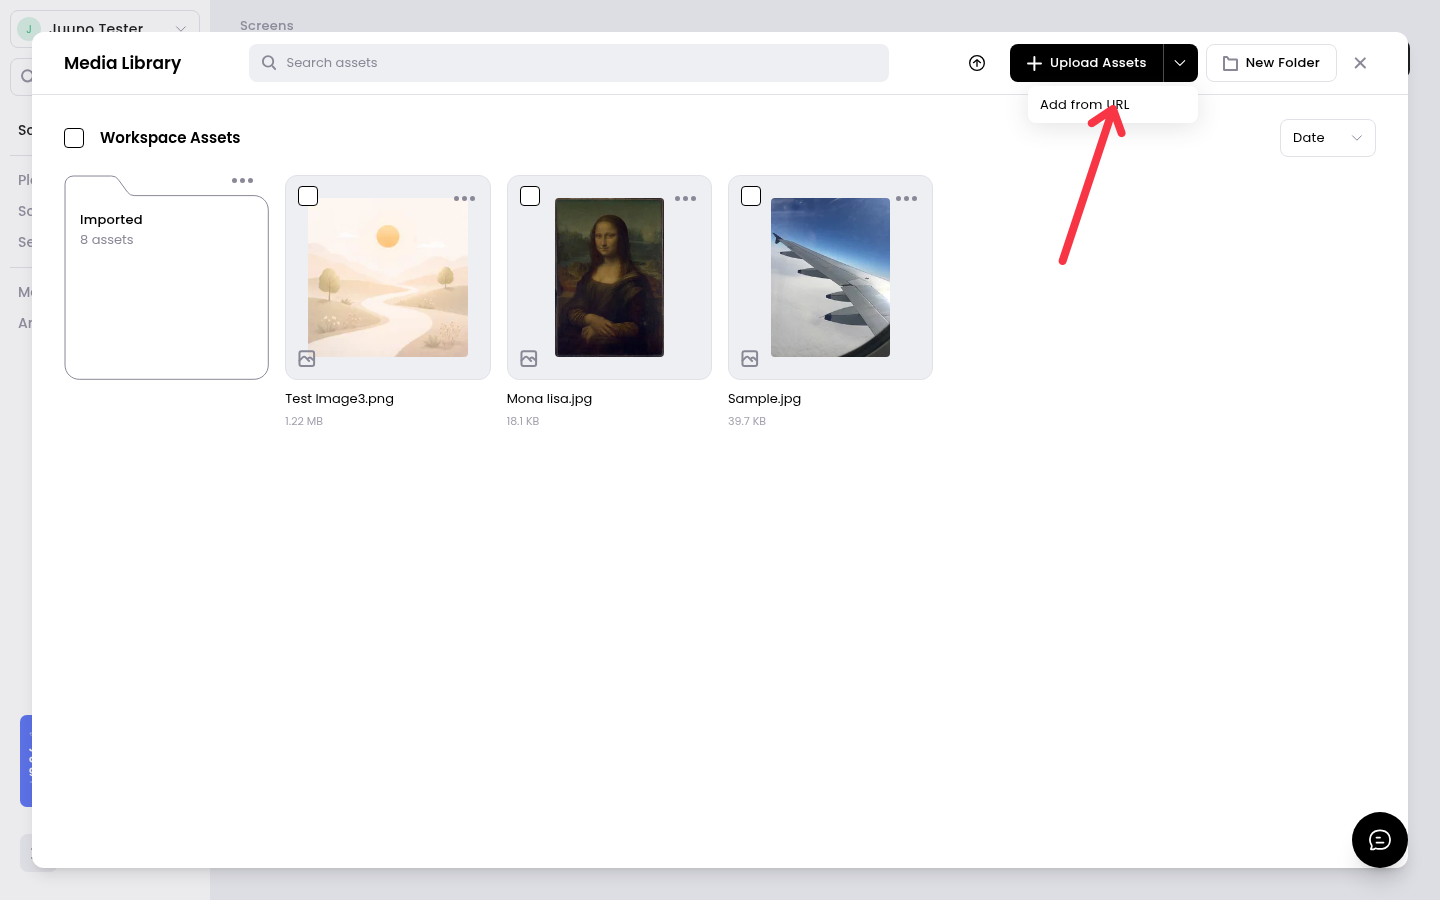
Click Add from URL.
Paste the file's URL into the Media URL field then click Add from URL.
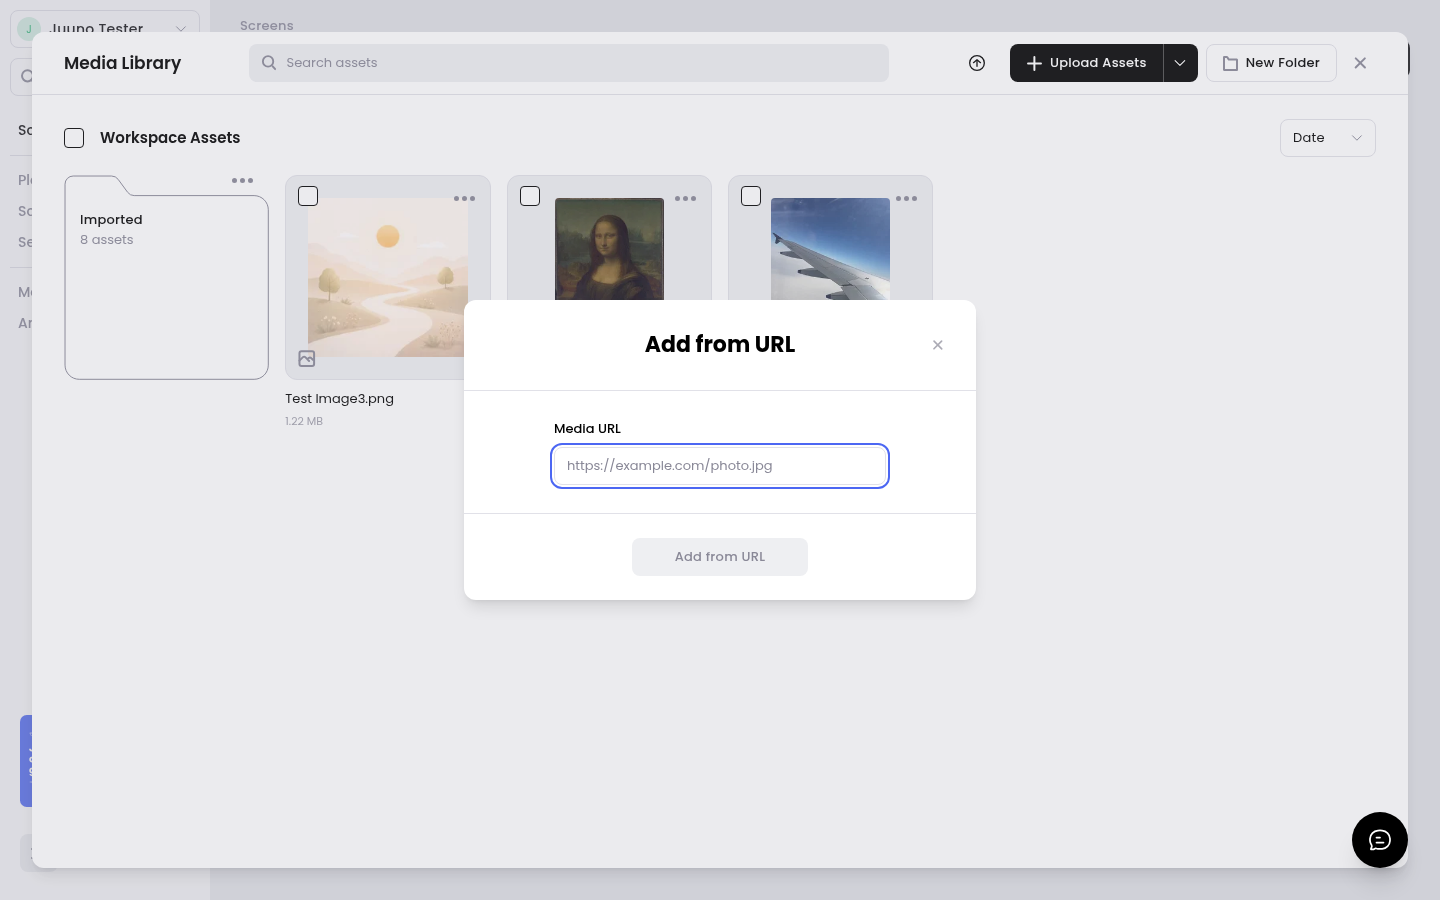
The import runs in the background, and the asset appears in the folder you started from when it finishes.
The URL must be a public http or https link that points directly to the media file. A link to a sharing page, a page that asks you to log in, or an HTML page won't import. The file must be a supported type and under 1.25 GB, the same limits as uploads.
If an import fails, the upload tray tells you why:
That URL is not safe or valid.
The download failed. Try the URL again.
The file is too large.
That file type is not supported.
Too many imports started recently. Try again in a minute.
Replace a file
Replace the file behind an asset you've already uploaded. Playlists and screens keep using the same asset, so nothing that references it needs updating.
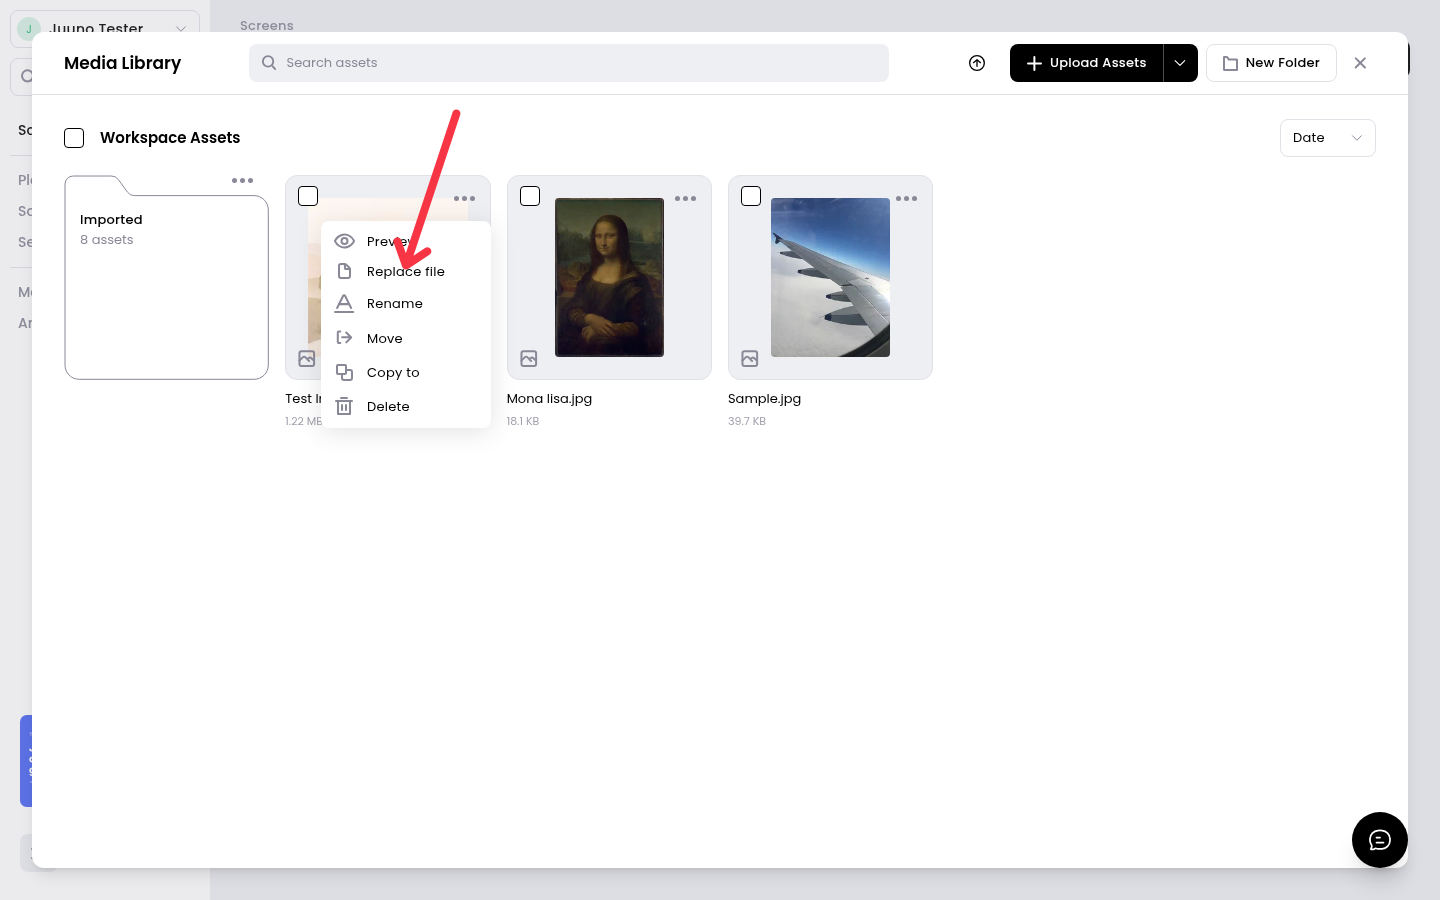
Open the Media Library and click the asset's three-dot menu.
Click Replace file.
Choose the new file. The picker filters to the asset's type: an image, a video, or a PDF.
Click Replace file in the confirmation dialog.
The asset keeps its name and folder, and the new file must be a supported type under 1.25 GB.
Images publish as soon as the upload finishes. Videos and PDFs keep playing the old file while the new one processes, then swap automatically: every screen using the asset shows the new file once it's ready. The asset card shows Replacing while the upload and processing run.
If processing fails, the card shows Upload error with a Try again option.
Workspace assets vs global assets
Assets live in either your workspace or globally across all workspaces. For companies with multiple workspaces, Workspace and Global scope navigation appears in a side rail beside the grid; companies with a single workspace don't see that scope pane.
Workspace Assets — Files specific to the current workspace. All workspace members can upload, manage, and delete these assets. Use workspace assets for location-specific or project-specific content.
Global Assets — Available only when your account has multiple workspaces. Files here are shared across all workspaces. Only account admins can upload and manage global assets, but all users can view and use them in playlists and apps.
Use global assets for company branding, logos, and content that appears everywhere.
Search the Media Library
Use the Search assets field to find assets and folders by name. It matches partial text, ignoring case, across the scope you're viewing.
Press Ctrl+K (or Command+K on Mac) to focus the search field. Search results highlight the matching text and show a result count; press Escape to clear an active search and return to the folder you left. When nothing matches, the library shows a Nothing matches message, and Clear search removes your query.
While a search is active, uploads and new folders are placed in the active scope's root, and Move and Copy open at the root. To find the folder an asset lives in, choose Open containing folder from the asset's menu.
The sort menu includes Size, which lists the largest files first.
Using assets in playlists and apps
When you add content to a playlist or app, click Browse Media Library to select an uploaded file or upload a new one. Workspace assets only appear when you're working in that workspace. Global assets appear in all workspaces.
For app-specific guidance:
Video App — Display a single video from your library
Video Slideshow App — Show multiple videos in sequence
PDF App — Display PDF documents on your screens
Managing your library
Keep your Media Library organized by deleting unused files and using clear file names before uploading. Workspace members can manage their own workspace assets. Admins control the global library to ensure consistency across all workspaces.