
How to Set Up a Custom Domain
White Label accounts can use custom domains instead of the default Juuno domains. You can set up a custom domain for the Juuno admin area, the screen player, or both.
Before you start
You’ll need:
Access to your domain registrar’s DNS settings
The domain or subdomain you want to use
Access to your Juuno White Label account
Set up a custom domain
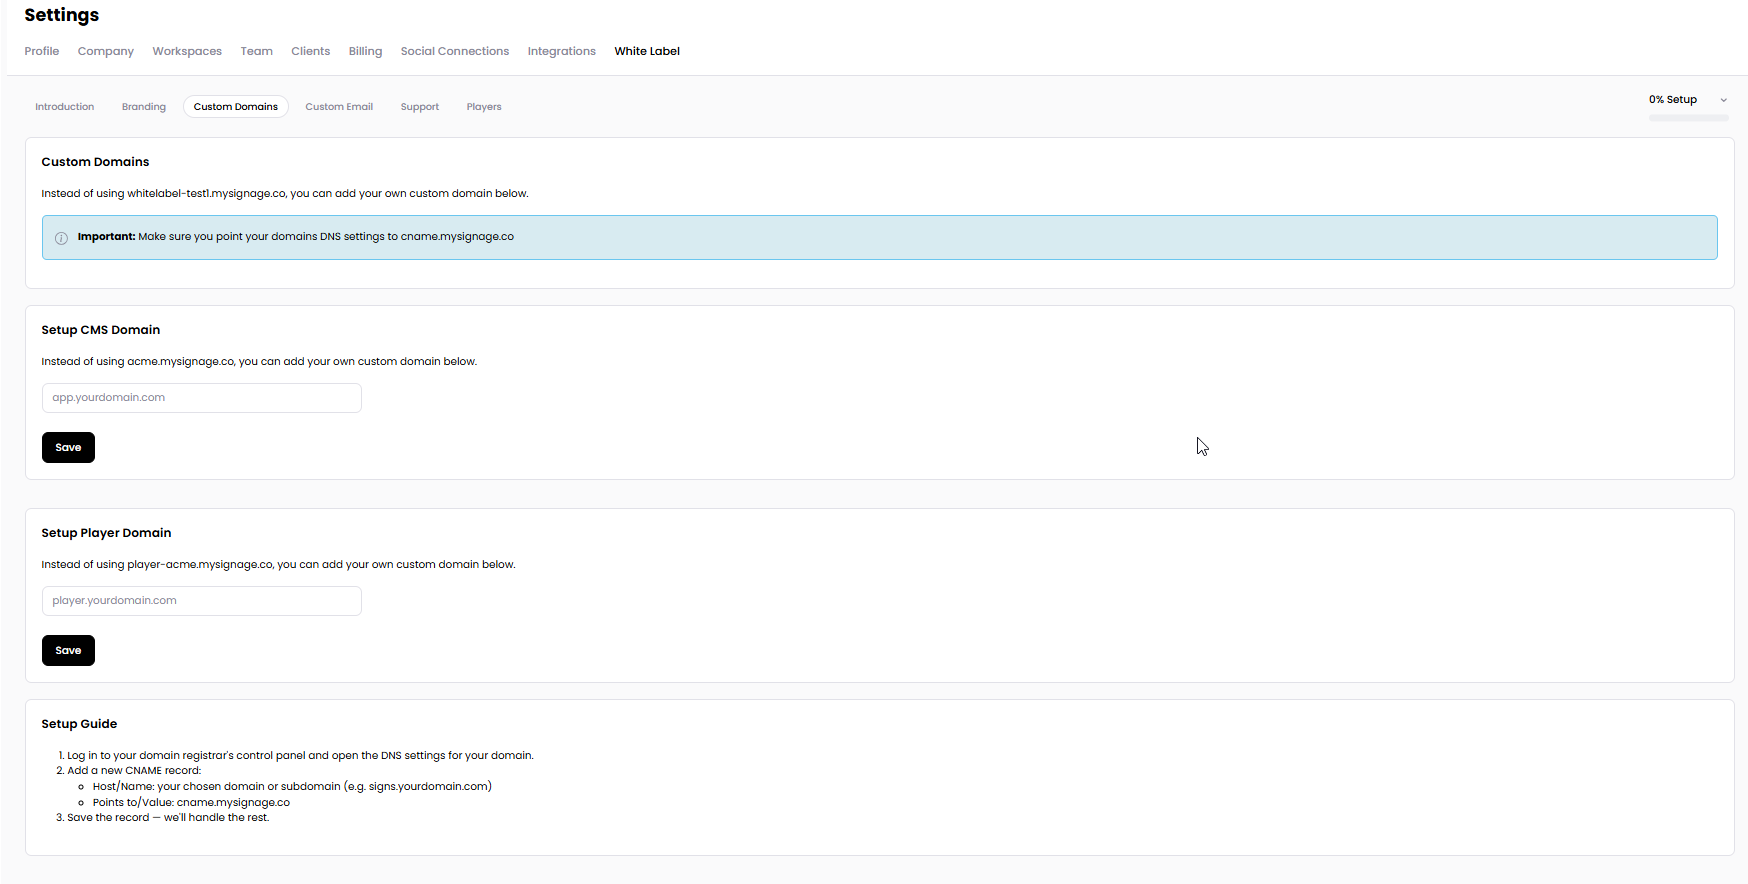
1. Open Custom Domains
Log in to your White Label account.
Go to Settings.
Select White Label.
Open the Custom Domains tab.
2. Add a CMS domain
The CMS domain is used for accessing the Juuno admin area. It replaces the default account domain, such as acme.mysignage.co.
In Setup CMS Domain, enter your chosen domain or subdomain, for example,
app.yourdomain.com.Open your domain registrar’s control panel and go to the DNS settings for your domain.
Add a new CNAME record with the following values:
Host/Name: Your chosen domain or subdomain, such as
app.yourdomain.comPoints to/Value:
cname.mysignage.co
Save the DNS record.
Return to Juuno and click Save under Setup CMS Domain.
3. Add a Player domain
The Player domain is used for the domain that loads your Juuno screen content. It replaces the default player domain, such as player-acme.mysignage.co.
In Setup Player Domain, enter your chosen domain or subdomain, for example,
player.yourdomain.com.Add a new CNAME record in your domain registrar’s DNS settings:
Host/Name: Your chosen player domain or subdomain, such as
player.yourdomain.comPoints to/Value:
cname.mysignage.co
Save the DNS record.
Return to Juuno and click Save under Setup Player Domain.
Important
Make sure both domains point to: cname.mysignage.co
DNS changes may take some time to become active. If your custom domain does not work immediately, wait a little while and try again.
Which domain should I set up?
CMS Domain: Use this to access your branded Juuno admin area.
Player Domain: Use this for your branded screen player URL.
You can configure either domain independently or set up both for a fully branded experience.